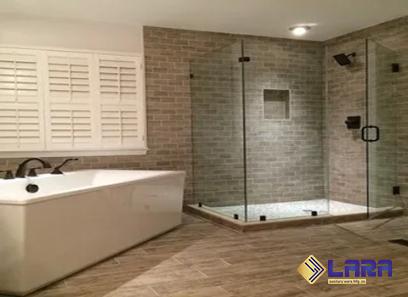
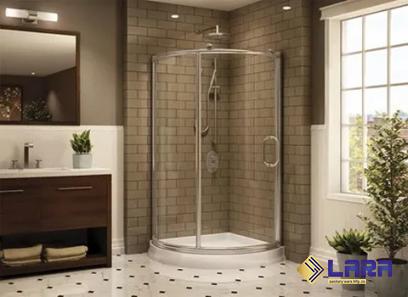
When it comes to home improvement, creating a cozy and functional bathroom is often at the top of the list. And one aspect that can make a significant difference is the shower. Today, we will discuss the benefits and steps involved in creating a DIY corner shower that not only maximizes space but also adds an elegant touch to your bathroom. The corner shower design has gained popularity in recent years due to its ability to optimize space utilization. By fitting into a corner, it allows homeowners to make the most of their bathroom layout, particularly in smaller or awkwardly shaped spaces.

.
 This makes it an ideal choice for those looking to renovate a compact bathroom or wanting to create a spa-like retreat in a master suite. The first step in creating a DIY corner shower is to carefully plan the layout. Measure the available space accurately, considering the dimensions of the desired shower enclosure. Determine the size and shape of the shower base, as this will dictate how the entire shower will be configured. Remember to account for any additional features you may want, such as built-in shelves or a bench. Once you have finalized the layout, gather the necessary tools and materials. The exact requirements will depend on your specific design and the type of shower enclosure you opt for.
..
 Common materials include tiles, grout, silicone caulking, glass panels, and a shower door or curtain. It is important to choose high-quality materials to ensure durability and longevity. Before starting the installation process, it is crucial to prepare the area. Remove any existing fixtures or fittings, and ensure the walls and floor are clean, dry, and level. Apply a waterproofing membrane to the floor and wall areas where the shower will be installed. This step is critical to prevent water damage and mold growth in the future. Next, it is time to install the shower base. Follow the manufacturer’s instructions carefully, ensuring it is level and securely anchored. Once the base is installed, proceed to tile the walls and floor. This step not only adds a visually appealing touch but also provides a waterproof barrier.
…
 Apply the grout between the tiles and seal all joints with silicone caulking to prevent water leakage. Now, it’s time to install the glass panels or shower curtain. If you choose glass panels, ensure they are securely fastened to the walls and base. Consider hiring a professional for this step if you are not confident in your DIY skills, as it requires precise measurements and precise installation to ensure the shower is leak-free. Finally, install the shower fixtures, such as the showerhead, controls, and any additional accessories. Ensure they are properly connected to the water supply and have been tested for functionality and water pressure. Check for any leaks and make adjustments as necessary. Creating a DIY corner shower can be a rewarding project that adds value and functionality to your home. By optimizing space and utilizing high-quality materials, you can transform a cramped bathroom into a luxurious oasis. However, it is important to consider your own skills and limitations before taking on such a project. If in doubt, consult with a professional to ensure the best results and long-term satisfaction with your new corner shower.